Jun 26, 2026Services Overview
The Ultimate Guide to Shower Faucet Installation, Maintenance, and Selection
Whether you're upgrading for style, replacing a worn-out unit, or tackling a full bathroom renovation, understanding how to install, maintain, and choose the right shower faucet is essential.
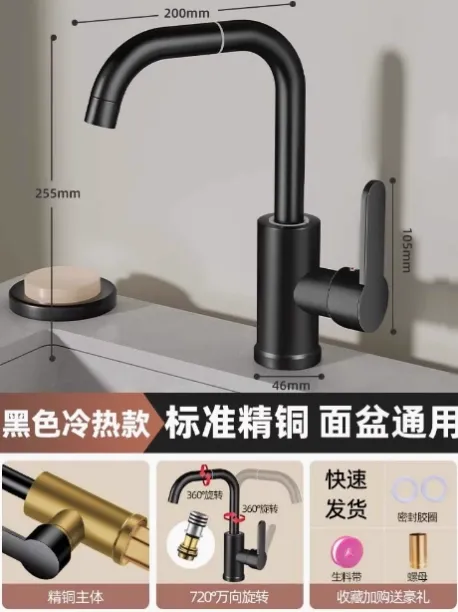
A shower faucet is more than just a functional fixture—it's the centerpiece of your daily bathing experience. Whether you're upgrading for style, replacing a worn-out unit, or tackling a full bathroom renovation, understanding how to install, maintain, and choose the right shower faucet is essential. This comprehensive guide covers everything from basic knowledge to step-by-step installation, cleaning tips, and troubleshooting common issues.
What Is a Shower Faucet?
A shower faucet (often referred to as a shower mixer or shower valve) is the device that controls the flow and temperature of water in your shower or bathtub. It connects to your home's water supply lines and directs water to the showerhead, tub spout, or handheld wand.
Choosing the right faucet depends on your specific needs:
- For a sink application – select a faucet designed for lavatory use.
- For a shower/tub – decide between single‑handle or double‑handle designs, and whether you prefer a lever or pull‑up control.
How Does a Shower Faucet Work?
The shower faucet consists of a valve body, a handle, and a spout (or outlet). The handle regulates water flow and temperature by adjusting the position of a cartridge or ceramic disc inside the valve. When you turn the handle, you mix hot and cold water to your desired temperature, and the water is then directed up to the showerhead through the riser pipe.
The showerhead itself is attached to a shower arm that extends from the wall. The arm is usually threaded and can be adjusted for angle. Water pressure and flow rate are determined by your home's plumbing system and the valve's design.
Types of Showerheads
Showerheads come in several styles to suit different preferences and mobility needs:
Type | Description |
|---|---|
Fixed Showerhead | Mounted directly to the wall arm; no swivel or adjustment. Simple and cost‑effective. |
Fixed‑Arm Showerhead | Has a short fixed arm; ideal for those with limited mobility as it positions water flow consistently. |
Swivel‑Arm Showerhead | Features a swivel joint that allows you to change the spray angle – great for families with varying heights. |
Frameless / Rain Showerhead | Mounted flush to the ceiling or wall without a visible arm; offers a luxurious, waterfall‑like experience. |
Common Materials for Showerheads
- Plastic – lightweight and budget‑friendly; often has silicone nozzles for easy cleaning.
- Stainless Steel – durable, rust‑resistant, and affordable.
- Aluminum Alloy – lightweight, wear‑resistant, and long‑lasting.
- Brass (Copper Alloy) – premium option with fine craftsmanship, thick plating, and superior durability.
How to Install a Shower Faucet: Step‑by‑Step
Installing a shower faucet may seem daunting, but with the right preparation and patience, you can complete the job in a few hours. Follow these detailed steps.
1. Gather Your Tools and Materials
You'll need:
- Adjustable pliers and a large pipe wrench
- Screwdrivers (Phillips and flat‑head)
- Plumber's tape (Teflon tape)
- Plumber's putty or silicone caulk
- Utility knife, measuring tape, and a level
- Bucket, towels, safety glasses, and gloves
- New faucet components (valve, trim, handles, showerhead, etc.)
2. Turn Off the Water Supply
Locate the shut‑off valve for the bathroom or your main water supply. Turn it clockwise until fully closed. Then, open the existing shower valve to release any remaining water in the lines. Place a bucket underneath to catch drips.
3. Protect the Tub/Shower Floor
Lay a drop cloth or painter's tarp over the tub or shower floor to prevent scratches and damage from falling tools or debris.
4. Remove the Old Handles and Trim
- Pry off the decorative caps on the handles (marked "H" and "C") with a flat‑head screwdriver.
- Remove the retaining screws and pull the handles off the valve stems. If they are stuck, apply penetrating oil.
- For two‑ or three‑handle faucets, remove the chrome flanges by twisting them counter‑clockwise. For single‑handle units, unscrew or cut away the large round plate.
5. Remove the Old Valve Assemblies
Use an adjustable wrench to unscrew the valve cartridges or assemblies from the wall pipes. Turn counter‑clockwise until they come loose. Clean any debris from the threads of the water inlet pipes using a damp cloth or old toothbrush.
6. Mark and Cut Access Holes (if needed)
Standard installation heights:
- Shower faucet valve: 45–48 inches (114–122 cm) from the floor.
- Showerhead: 72–78 inches (183–198 cm) from the floor.
Measure and mark the positions carefully. If you need to cut into tile or drywall, use the appropriate tile drill bits and make precise openings. Clean the area with a bleach or vinegar solution (never mix bleach and vinegar) and ensure the wall cavity is completely dry before proceeding.
7. Prepare the New Valve Assemblies
Before installation, open all new valves by turning their stems counter‑clockwise. This ensures they will seat properly. Identify the diverter valve (if any) and set it aside – it should be installed last.
8. Apply Plumber's Tape
Wrap Teflon tape clockwise around the threads of each new valve component. Make three full wraps, pulling tightly so the tape conforms to the threads. This creates a watertight seal. (Some manufacturers may recommend not using tape – always consult the instructions.)
9. Install the New Valves
Screw the new valves into the wall pipes clockwise by hand for 3–4 turns. If resistance is too high, back out and try again – do not cross‑thread. Finish tightening with adjustable pliers or a wrench, but avoid over‑tightening, which can damage the threads or valve body.
10. Install the Nylon Sleeves and Flanges
- Slip the white nylon sleeve over each valve stem and hand‑tighten it into the valve base (use a cloth to grip if needed – no tools, to prevent thread damage).
- Screw the chrome flange onto the sleeve until snug against the wall.
11. Attach the New Handles
Place the new handle over the valve stem's notched tip, insert and tighten the retaining screw. Close the valve (turn handle clockwise) to the shut‑off position. Repeat for all handles, then snap on the decorative caps (left = "H", right = "C"; diverter arrow points down).
12. Seal and Caulk
Apply silicone caulk around any gaps where the trim plates meet the wall. Allow at least 24 hours for the caulk to cure before using the shower.
13. Turn Water Back On and Test
Slowly turn on the main water supply. Open the new shower faucet and let water run for a few seconds to flush out air and debris. Check all connections for leaks. If everything is dry and flow is normal, your installation is successful.
Shower Faucet Height & Spacing Guidelines
- Valve height from floor: 90–110 cm (approx. 35–43 inches) – adjustable based on user height, but never exceed 110 cm to avoid issues with the riser tube.
- Reserved thread depth: The threaded nipples should sit just inside the finished wall tile, so the decorative covers fit flush.
- Center‑to‑center distance of hot/cold inlets: Standard is 10–15 cm (about 4–6 inches). Many shower kits include adapters, but it's best to position the pipes accurately to avoid using adapters for a cleaner look.
Maintenance Tips for Long‑Lasting Performance
- Single‑handle faucets: Open and close gently to prolong cartridge life.
- Double‑handle faucets: Avoid closing too tightly, which can strip the stops.
- Wall‑mounted faucets: Prevent impact from heavy objects – they are more exposed and the plating can be scratched or dented easily.
- Reduced water flow? If water pressure is above 0.02 MPa and output drops, the aerator or cartridge may be clogged. Unscrew the outlet screen cover, clean out debris, and reinstall.
How to Choose the Right Shower Faucet
1. Color and Finish
Stainless steel is modern and versatile, but black, brushed nickel, or matte gold can dramatically enhance your bathroom's aesthetic. Coordinate with other fixtures (towel racks, shower frames) for a cohesive look.
2. Unit Type and Apartment Size
- Large bathrooms – double‑handle, multiple‑outlet systems add a luxurious feel.
- Small apartments – single‑handle, compact designs save space and look sleek.
3. Family Needs
- Two‑handle faucets clearly mark hot and cold – ideal for children and the elderly.
- Single‑handle is stylish and simple but requires careful temperature adjustment.
- Thermostatic shower mixers let you set a precise temperature (and limit it to prevent scalding). They maintain consistent temperature even when other water outlets are used.
Cleaning Your Shower Faucet
To keep your faucet looking new:
- Wipe the surface with a soft, lint‑free cloth and mild detergent.
- Do not use abrasive pads, steel wool, or cleaners containing acid, bleach, or harsh chemicals.
- For stubborn deposits, use a mild liquid glass cleaner or a non‑abrasive polish.
If water flow reduces, clean the aerator by unscrewing the tip and rinsing out sediments – this usually restores full pressure.
Fixing a Leaking Shower Mixer
A persistent drip is annoying and wasteful. Here's how to address it:
- Shut off the water supply (local valve or main).
- Remove the handle – pry off the cap, unscrew the screw, and pull off the handle (use a puller if stuck).
- Remove the old cartridge – using a cartridge puller, carefully extract the cartridge from the valve body.
- Install a new cartridge – ensure it's seated correctly and the handle is in the "closed" position before tightening.
- Reassemble and test – turn water back on and check for leaks.
If leaks persist, the rubber washers or O‑rings inside the valve may be worn. Replace them with correctly sized ones from a hardware store.
Final Thoughts
Installing a shower faucet is a rewarding DIY project that can transform your bathroom's comfort and appearance. With careful planning, the right tools, and attention to detail, you can achieve professional results without the expense of a plumber.
Remember: always turn off the water before starting, and don't hesitate to consult the manufacturer's instructions for your specific model. A well‑maintained shower faucet will serve you reliably for years.
Looking for high‑quality, stylish shower faucets? Explore our collection at FaucetU – where durability meets design.